Had a little too much to drink last night? Or maybe planning to have a little too much to drink one of these nights? Well my friend, I do believe I have the solution for you. And yes, it actually works. Or at least it did for me- like a freaking miracle- the one time I tried it (two nights ago). Obviously further testing is required, but I have enough experience with alcohol- with too much alcohol- to know quite well how it affects me. And it affects me pretty easily. I'm pushing 40 and have found that even just a couple beers within an hour of going to bed, even if I don't feel even a little intoxicated, and I'm at least looking at a headache in the morning. The ravages of age... However, through past experience, research, and just asking other drinking friends, I've found that one thing that seems to help alleviate a hangover pretty well and pretty consistently, is electrolytes. The stuff you get in Gatorade and other sports drinks that you're supposed to replenish after a strenuous workout (or strenuous night of drinking). Recently, coconut water has been making the rounds as a good hangover relief- supposedly it's got a higher concentration of key electrolytes in it than other electrolyte-laden beverages. And that may be true, but I can tell you that it's also a lot more expensive than those other beverages, and it's definitely an acquired taste. To me it tastes exactly like the milk that's left over in the bowl of a sugary cereal (like frosted flakes, or something). Exactly like that. But, small price to pay if it works, right? Well that got me thinking- if electrolytes are key (and my past experiences drinking Powerade the next day, as well as similar stories I've heard from other people tell me that this is in fact true), then what exactly are electrolytes, and how can I get more of them in me, short of drinking more Gatorade or coconut water? So I started looking around online and found that electrolytes include: sodium, magnesium, potassium, bicarbonate (from baking soda) and calcium. I don't know if sugar is considered an electrolyte exactly, but I know that you need a certain amount of it during intense workouts to keep your blood sugar level up and maintain performance levels. So anyway, I decided to try and come up with my own electrolyte drink using some of those ingredients I'd read about and loosely based on this recipe for a homemade sports drink. Here's what I came up with, followed by how well it worked for me:
1 can of 100% fruit juice concentrate + 4 cans of water
1T Epsom salt
1/4t kosher salt
...
1 Potassium Gluconate tablet (550 mg, 90 mg Potassium, i.e. 3% DV. Found in the vitamin aisle.)
First off, I probably don't need to mention this, but I'd stay away from o.j, or other high-acid juices. And you definitely want 100% juice, no added sugar. I used grape juice; nice and neutral. The Epsom salt is where you get the Magnesium. You could also take a Magnesium tablet instead, and I'll probably do that in the future, but I used the Epsom salt this time around because I just happened to have some on hand, so figured I'd save a few bucks by not buying the magnesium tablets. In any case, Potassium and Magnesium tablets are fairly inexpensive- around $5/100-150 tablets, so definitely way cheaper in the end than drinks like Gatorade/Powerade/coconut water. Also, I think the key here is in prevention- don't wait until the next day when you're already super dehydrated and hung over to drink this up- drink it after you're all done drinking for the night (or even during. Just try to get some in you before you pass out/fall asleep). As far as the taste goes, it tastes somewhat similar to, but still better than, Gatorade/Powerade. I'm guessing it's the Magnesium that does that, so if you went with the Magnesium tablet instead of the Epsom salt, you could probably eliminate that altogether.
So here's my experience: two nights ago, I ended up getting a little drunk. Actually, a lot drunk. Like really, really drunk. Started off with beer, then switched to vodka later on. And mixing alcohols like that is pretty much guaranteed to leave me feeling some regret in the morning. Plus, I stayed up until between 4 and 5 in the morning. A pretty heavy night overall. On the rare occasion when I do drink that much, I always try to drink plenty of water in between, and especially before I head off to bed, to try and stay at least a little hydrated. But I got sidetracked and had little to none that night. I also try to take a couple Ibuprofen before heading to bed to help mitigate the pounding headache I know I'll have in the morning. But that night I forgot that as well. I did, however, remember to take a few large swigs of this homemade electrolyte drink and take 1 Potassium tablet before I crawled into bed. I woke up approximately 8 hours later- no trace of a headache, no trace of nausea. Nothing. I was a little groggy still (probably partly because I'm not used to staying up till past 4 a.m.) but fairly clear-headed and I remember thinking that it just hasn't kicked in yet, but it surely will. Except that it never did. Not the pounding headache or awful retching the contents of my stomach out, anyway. The only real hangover effect I felt was that I was very, very tired, almost fatigued, and had to lay back down for a nap a few hours after getting up. That always happens to me anyway after a night of drinking like I had, but not having an extreme headache and nausea to go along with it definitely made it much more bearable. Though I would almost expect to be that tired (even after 8 hours' sleep) if I'd stayed up that late and hadn't had anything to drink. So that was my experience with this hangover relief recipe. While it could, possibly, have been just a coincidence that I woke up feeling relatively fine after all that drinking (I've heard of it happening sometimes with other people), my past experience tells me that that's highly unlikely. So while I don't very often get quite that loaded, I think I'm going to stick with what worked next time I have a night of drinks planned. (I may also add some calcium to the mix too, since that was also listed as a key electrolyte.) I'd be interested in hearing in the comments how well this recipe works for you if you try it out, or any other methods you've tried that work really well. (Just remember- drink it the night before! And also, get drink/get drunk responsibly! Don't be like the guy we had at work the other day who got too tanked and tried to go someplace he wasn't supposed to and ended up falling down a steep flight of stairs, punching a hole in the wall at the bottom with his head.
)
Wednesday, December 29, 2010
Friday, December 17, 2010
Rockin' The Burrito Casbah
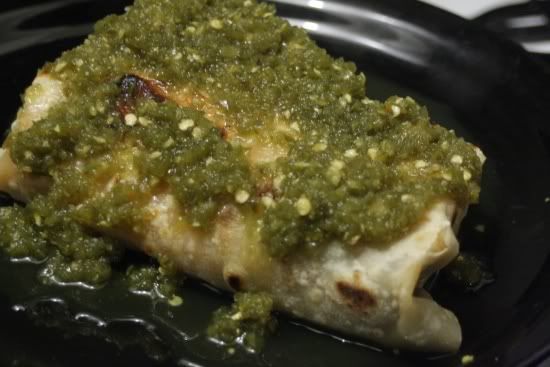
The humble bean and cheese burrito- mediocre convenience store freezer fare? Not when you make it yourself from scratch! Behold! The homemade tortilla, homemade refried beans, the homemade jalapeño salsa! One bite of this and even the girliest girl will slobber all over herself to get some more.
I humbly submit to you that I. Freaking. Rock.
*****
I had this for dinner last night and tonight. Both times I was freaking out at how delicious it was. And dead simple to make too (especially if you make up a large batch of tortilla dough and refried beans in bulk in advance, but even if you don't, only slightly more work; and the payoff is huge). I never, ever would have thought a bean and cheese burrito could be so good. Usually when I make burritos I go for chicken, or beef, or bacon, but I've had a huge bag of pinto beans lying around for awhile now and my pressure cooker just waiting for a chance to get used, so I finally made up a batch of beans and threw this thing together. It's almost too easy to make; you really can't do it wrong. As for the refried beans, there's recipes all over the place on how to make them, but I don't bother with any of them. Here's how I do mine- cook off a large batch using your preferred method. Mine would be the pressure cooker. If you don't have one, I can't recommend them highly enough. You can take unsoaked beans and have them completely done and ready to go in under 30 minutes! And that includes the time waiting for the water to come to a boil and build up pressure, as well as the slow method of releasing pressure (running the pot under cool water in the sink). So get yourself a large amount of cooked and slightly cooled pintos and throw them in the food processor. Add in a little of the cooking liquid, some oil, and whatever seasonings you think you might like in whatever amounts seem good. I tend to go very light on the salt since the salsa already has plenty in it, but here's what I tend to use:
Jalapeño powder
Granulated garlic
Mexican oregano
Lime juice
Epazote (a Mexican herb, kind of similar to oregano)
Black pepper
Cumin
and whatever else I've got lying around that sounds like it might be good. (Chipotle powder is excellent, and I've found that a pinch or two of cinnamon adds a really nice touch as well.) You'll want it just a little on the thin side, since it'll thicken up as you cook it. Whip it all up and then toss it in a pot with as much cheddar as you like (I recommend setting up some sort of double boiler so it doesn't all stick to the pan on the bottom) and then it's pretty much good to go. You definitely want the homemade tortillas for this. They're just so much better than store-bought. There's quite a few recipes out there for them, and they're all more or less the same. I tend to use this one a lot, but this one looks good too. I've never made them with the baking powder though, so I'm not sure what sort of a difference that makes. The dough freezes really well too- I usually make up a double batch and then roll them out into roughly golf-ball-sized portions and then freeze them on a sheet tray, then toss them into a zip top bag. As far as cooking them goes, an extra large cast-iron skillet would be great, but all I've got is a wok. Seriously. Works just fine, though. As far as the salsa goes, THIS recipe is where it's at! So, so good. I make mine slightly different, though- for one, I'm not a fan of serranos, so I use all jalapeños, and I don't strain mine, either. Seems like a waste. Once it's ready I just blend it all up with my stick blender and call it good. No, make that call it great, actually. I freaking love this salsa. If you decide you want to go with a store bought variety though, Valentina is pretty damn good, and Tapatio goes pretty well on burritos too.
Here are those links again-
Flour tortilla 1
Flour tortilla 2
Vinegar based hot sauce
Give it a whirl. I think you'll be surprised at how good a bean and cheese burrito can really be. I know I was.
Monday, December 6, 2010
Moroccan Chicken Sandwich
Tasty!
I want to start off with a disclaimer: I've never been to Morocco, or even eaten at a Moroccan restaurant here in the States. I have no actual hands-on experience with 'true' Moroccan food whatsoever- just my own experiments at home that resulted from a whole bunch of hunting around online for Moroccan recipes. So if you ever find yourself ordering a sandwich at a Moroccan restaurant- if they even have sandwiches on the menu- it will probably be nothing like this one. But calling it a 'Moroccan-Inspired Chicken Sandwich' sounded kind of dumb. (And besides, it's made with Ras el Hanout which is a 'true' Moroccan spice blend). But none of that really matters, because this sandwich is good. Really, Really Good. You (and all your friends) will like it, of that I'm sure. I'm also sure that you've never had a sandwich quite like this before. You know how I'm sure? Because I Googled 'Moroccan Chicken Sandwich' and found only a few things, none of which was even remotely like this. The closest one I've been able to find was this one. Not really anything like mine, which is also a whole lot messier. Easily one of the messiest sandwiches I've ever eaten (you'll need extra napkins, and a spoon wouldn't hurt either).
Here's the short list of what you'll need:
(specifics after the jump)
Boneless Chicken Breast
Cardamom Mayo
Ras El Hanout
Flatbread
Coconut Milk
Dried Fruit
Toasted Almonds
Cilantro
Diced Tomatoes
Optional, but not really, because they're totally amazing and easy to make. So if you do choose to make them optional, just remember that they're highly recommended:
Preserved Lemons
Ok, let's start with the Ras el Hanout, a blend of spices that is used extensively in Moroccan cooking. After that trip down the spice aisle at Target that I mentioned in the previous post, I started hunting around online for Moroccan recipes, paying close attention to the spices used, and I found a boatload of recipes for Ras el Hanout. You can certainly buy it many places nowadays, but I think it's better (and way cheaper!) to make your own, whether it's your own personal blend, or from a recipe you found on the internets. And being a blend, there are about as many variations of it as there are people who use it. I never did try a single one of the ones I found, though; because while they're all similar, they're all quite different too- some called for cumin and paprika, while others left out the cardamom (!) or coriander. There wasn't really a whole lot of consensus, which is totally fine and makes perfect sense, so I took a bunch and tried to come up with my own, based on the whole of what I found. First, here are the ones (that I can remember) that I based mine on -
Cyber Kitchen
Kayotic Kitchen
Cannellette
Chow
The Epicentre
(The link that I posted above to the Moroccan Grilled Chicken Sandwich also has a recipe for Ras.)
A few used saffron, which I would have liked to have tried, but it's just too expensive for me ($18/3 grams, or $106/oz. at Spice Barn, the cheapest place I've found). But I'm happy with what I came up with nonetheless, although I still consider it a 'working' recipe' (meaning that it works great for me, but I plan on tweaking it a lot in the future- maybe less pepper, definitely more cardamom).
My version includes most of the usual stuff, plus some more:
paprika, cumin, fennel, ginger, turmeric, kosher salt, cinnamon, garlic powder, coriander, allspice, cardamom, nutmeg, cloves.
A couple notes: I generally recommend toasting most of your spices first- adds a nice richness to the flavor. It's kind of hard to taste-test a spice blend of this sort as you're making it, since it really needs some sort of vehicle to bring out the flavors of the spices that are in it. If you were to taste it straight out of the bowl (which I always do when trying new blends) it would probably taste like dirt. Bitter dirt. And you would be thinking that it couldn't possibly taste good on anything. But you would be wrong! Try blending it with some honey, or coconut milk and dried fruit which is what I do in this recipe.
So that's the Ras. Now comes the Cardamom Mayo! This stuff is just flat-out delicious. I have no idea how I came up with it or what, if any, inspiration I had for it. There must have been some rhyme or reason for it, but then again, maybe not; maybe I was just experimenting and got lucky, I really don't remember. I did try making it once with whole-milk yogurt, thinking that would be a little more true-to-style, but didn't really like it. Mayo is preferred (homemade mayo is especially preferred. I'll post a link at the end to a nearly foolproof homemade mayo recipe I found).
Cardamom Mayo
3/4 c. mayo
1T ground coriander
1T ground cardamom
Zest of 1 lemon, juice of 1 half
1T honey
pinch salt/pepper
sprinkle cinnamon/cayenne
Definitely don't skip the cayenne, but be careful about adding too much- the excess heat isn't the issue, it's just that the flavor of the cayenne overpowers and ruins all the other flavors. Less really is more.
Preserved Lemons
You can buy commercially made preserved lemons, if you don't feel like making your own, or need some in a pinch, but I've heard that they're very expensive. But they're so easy to make on your own, not to mention dirt cheap, that there's really no reason not to. Pretty much all you really need, besides lemons and salt, is time (they're ready in about 6-8 weeks). I'm going to skip the recipe here, but here are a couple links to recipes I've used:
Tony Tahhan
Sippity Sup
Tony's is the first one I used and it's dead simple. Sippity's recipe calls for adding some aromatics. I made a batch using the exact recipe, minus the bay leaves because I didn't have any; honestly, though, I didn't really notice a difference. Not that it's not worth doing, I just think I'd add more of everything it calls for. But one thing I especially like about the recipe, is that she has a photo of them sitting in a large glass jar, held under the juice with a small plate. It seems obvious now, but since all the other recipes I've seen call for using mason jars, if you've never made any before, then you might subconsciously conclude that you need a mason jar to make preserved lemons. Well, follow her example and use what you've got. I actually have several jars of the stuff in my fridge, but I also have a 1-gallon Rubbermaid pitcher of them too. It was a lot easier to make them- and it's also easier to remove them- but the downside is that I also have a 1-gallon Rubbermaid pitcher of them in my fridge, which is probably more than I'll ever be able to use. Seriously, a little goes a long way- 1 piece (1/4 lemon) is easily enough for 2 or 3 servings.
Flatbread
If you know of a decent store-bought kind that you like, go for it; if not, I found this one over at Allrecipes awhile back and have been using it ever since (I always skip the garlic, though). The flatbread you see in the photos was made with this recipe.
Ingredients:
1 (.25 ounce) package active dry yeast
1 cup warm water
1/4 cup white sugar
3 tablespoons milk
1 egg, beaten
|
2 teaspoons salt
4 1/2 cups bread flour
2 teaspoons minced garlic (optional)
1/4 cup butter, melted
|
Directions:
1. | In a large bowl, dissolve yeast in warm water. Let stand about 10 minutes, until frothy. Stir in sugar, milk, egg, salt, and enough flour to make a soft dough. Knead for 6 to 8 minutes on a lightly floured surface, or until smooth. Place dough in a well oiled bowl, cover with a damp cloth, and set aside to rise. Let it rise 1 hour, until the dough has doubled in volume. |
2. | Punch down dough, and knead in garlic. Pinch off small handfuls of dough about the size of a golf ball. Roll into balls, and place on a tray. Cover with a towel, and allow to rise until doubled in size, about 30 minutes. |
3. | During the second rising, preheat grill to high heat. |
4. | At grill side, roll one ball of dough out into a thin circle. Lightly oil grill. Place dough on grill, and cook for 2 to 3 minutes, or until puffy and lightly browned. Brush uncooked side with butter, and turn over. Brush cooked side with butter, and cook until browned, another 2 to 4 minutes. Remove from grill, and continue the process until all the naan has been prepared. |
I don't know about the golf ball size measurement because I weigh mine out now. I've found that 3-3 1/2 oz. works really well for me. It's always tempting to make them bigger so I can have a bigger sandwich, but it never really works out in practice. You can only fill them up so much before everything falls apart and makes an even bigger mess than it otherwise would. Also, while an oiled grill on high probably works great, I get fantastic results from cooking mine in a dry wok on medium.
I hate when recipes call for yeast by the packet because I buy mine in bulk. I have a scale, so if they list the weight, it's not really a problem, but if you also use bulk yeast and don't have a scale, let me save you a step:
1 packet of yeast is approx. 2 1/2 t.
Putting it all togetherBoneless Chicken Breast
Cardamom Mayo
Ras El Hanout
Flatbread
Coconut Milk
Dried Fruit
Preserved Lemons
Chopped, Toasted Almonds
Cilantro
Diced Tomatoes
(I don't have exact amounts for any of this, but figure that you're only going to be able to use about 3-4 oz. of chicken breast per sandwich.)
Start by adding coconut milk and water to a medium sized saucepan, over medium heat- use a 1:1 ratio, or even more, of water to coconut milk (say, 1-1/2 cans of water per can of coconut milk). It may seem rather thin now, but it'll thicken up a lot as it cooks. Add in as much or as little Ras el Hanout as you like. I like a lot. I don't even measure it- I keep mine in a wide-mouth jar and just shake a bunch in until it looks good. Taste it and see (note that it might seem like it needs a little... 'something;' sugar, maybe? That's where the dried fruit, and later on, cardamom mayo come in). When it's to your liking, add in your raw chicken, either sliced very thinly or diced, 1 piece of minced preserved lemon peel, and a handful or so of chopped dried fruit. I've used figs, raisins, dates, and apricots; each one adds its own unique take on the flavor of the final dish and I like them all. Raisins have the added benefit of being small enough that you don't have to chop them. (And in case you missed my last post- Walgreens, of all places, has really high quality, really cheap ($1/box) dried fruit. At least the one in my neighborhood does, but I'm pretty sure the rest have the same supplier.) You'll probably have to turn the heat down to low because the mix will thicken considerably and start to bubble and splatter a lot. Now would be a good time to spoon out a piece of the chicken and take a bite to see if it's done. No, I'm kidding. You should probably wait several minutes until it at least looks like it's cooked, then spoon out a piece and maybe set it on a cutting board or something, to slice it open and check for sure. And unless you're using really large, thick pieces (not recommended) it really doesn't take long at all, maybe 7-10 minutes. When you've decided that it is in fact ready, take a piece of freshly made/heated flatbread and spoon a bunch of the chicken/fruit mix into a line down the center of it (try to drain off most of the coconut milk beforehand; it's going to be plenty messy as it is without it). Add some diced tomatoes, a spoonful of cardamom mayo, a sprinkle of the almonds, and then the cilantro. In that order.
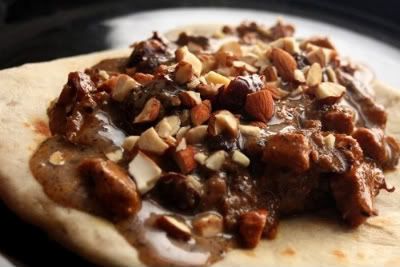
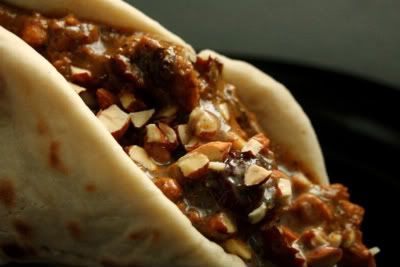
Fold it into a taco shape and prepare yourself for one of the tastiest, messiest sandwiches you've ever had.
Variation: If you're planning a bbq or something, or just don't feel like going the messy route, this will also make a great 'regular' sandwich- just make a marinade out of some Ras and oil and lemon juice/preserved lemon and then coat some chicken breasts with it and marinate for awhile before tossing on the grill. Goes great on a regular hamburger bun with Lettuce, Tomato, and Onion, and also the cardamom mayo, almonds and cilantro. Maybe a slice of Muenster as well.
This is a great recipe for homemade mayo that I found (you'll need an immersion blender). When I was getting ready to make it for the first time I remember thinking that there's no way this would work. No Way. But it did! In fact, it works fantastic! No more super slow drizzling of oil, no need for a food processor. Once all the ingredients are in your mixing vessel, it literally takes about 5-7 seconds to whip up a batch. Keep in mind, though, that room temperature ingredients are key. The only time this didn't work for me was when my egg was close to- but not quite at- room temp.
***
Yes, I realize there's no cilantro or tomatoes on the sandwich in these photos- that's because even though there's a grocery store only a mile and a half from my house, when you don't have a car, you have to learn to make some sacrifices. In this case, I sacrificed the cilantro and tomatoes. The sandwich was still awesome. In no case, however, should you ever sacrifice the cardamom mayo or almonds. They're an integral part of the sandwich. If you don't have any on hand, hold off on making this until you do. And if you're allergic to eggs or almonds? Well, it's worth whatever reaction you might have. If you're deathly allergic, however- well, at least you'll die with a smile on your face.

The plate's not as dirty as it looks. I swear.
Subscribe to:
Posts (Atom)